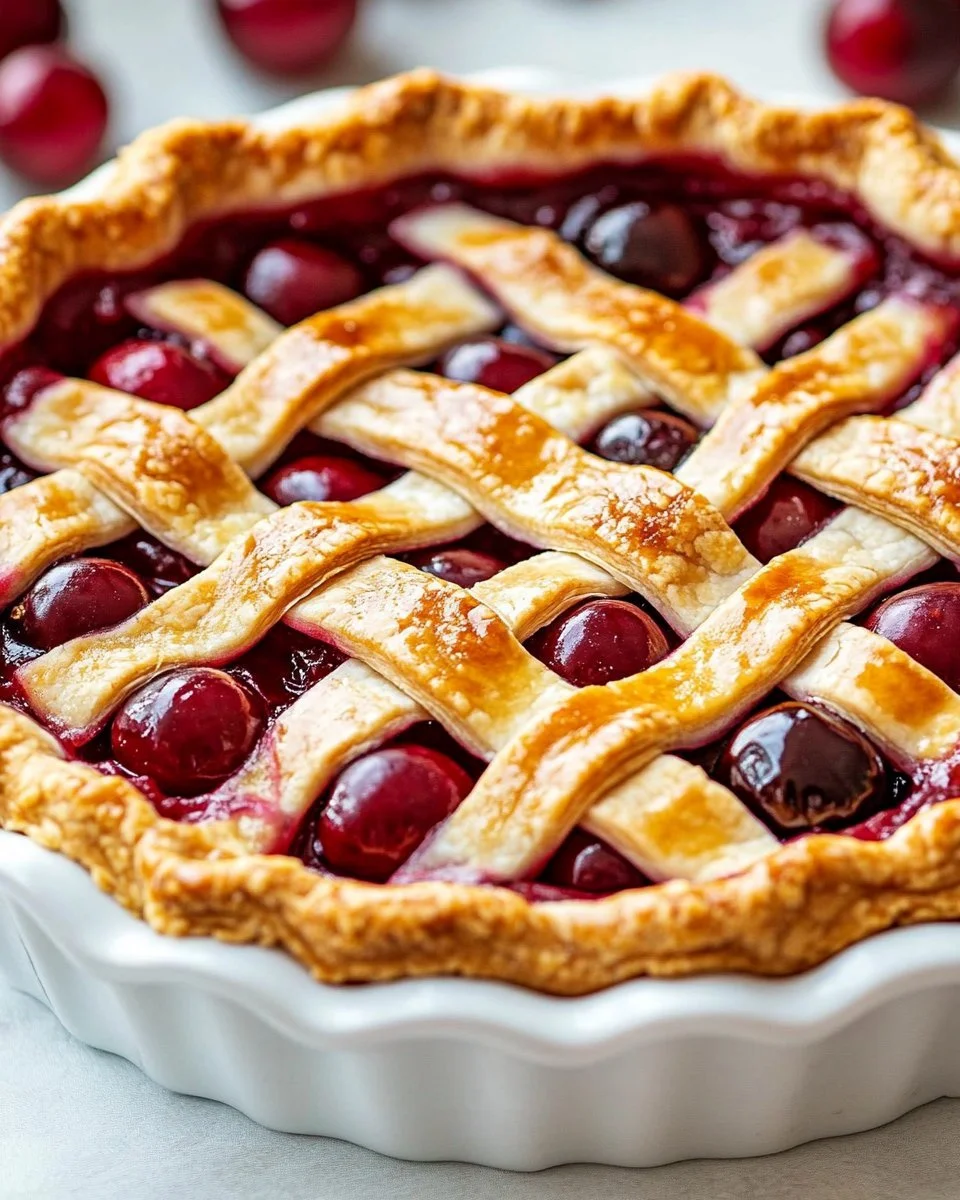
Perfect Homemade Cherry Pie
Perfect Homemade Cherry Pie is truly a delightful dessert that evokes the warmth of summer, even when the seasons change. This recipe is not just about creating a visually stunning pie; it’s a step-by-step guide that fills your kitchen with the irresistible aroma of sweet cherries and buttery crust. Each bite of this pie harmonizes the juicy cherries with a flaky crust, making it not just a dessert but a nostalgic experience. Whether you’re an experienced baker or a novice, this homemade cherry pie is worth making because it promises to become a cherished tradition in your home.
Why You’ll Love This Recipe
There are numerous reasons why this cherry pie will win over your heart. First, it’s incredibly easy to prepare. With just a handful of ingredients and simple steps, you can whip up this delicious dessert in no time. It’s family-friendly — your kids will love helping pitter the cherries and rolling the dough. Plus, this recipe combines practicality with tradition, ensuring that you’re using minimal ingredients without sacrificing flavor. It’s also a great way to celebrate seasonal cherries but works beautifully with frozen ones as well.
Ingredients for Perfect Homemade Cherry Pie
- 4 cups Fresh Cherries: Vibrant, plump cherries will add a burst of flavor and sweetness.
- 1 cup Granulated Sugar: This balances the tartness of the cherries and promotes caramelization.
- 2 tablespoons All-Purpose Flour: It acts as a thickener, absorbing the juices as the pie bakes.
- 1 tablespoon Fresh Lemon Juice: This brightens the flavors and adds a hint of acidity.
- 2 tablespoons Unsalted Butter: For that rich flavor that melds beautifully with the cherries.
- 1 prepared Pie Crust: A flaky crust that cradles all the deliciousness inside.
Step-by-Step Directions
Preheat your oven to 425°F (220°C). This high temperature ensures the crust gets that golden, flaky texture you desire.
In a large mixing bowl, combine the pitted cherries, sugar, flour, and lemon juice. Toss gently and let sit for 10-15 minutes. This step lets the cherries release their juices, making the filling rich and flavorful.
Roll out one half of your pie crust and transfer it to a pie dish. Trim any excess crust hanging over the edges for a clean look.
Pour the cherry filling into the prepared crust, distributing it evenly. Dot the top with small pieces of butter to add creaminess to the filling.
Roll out the second half of the pie crust. You can either cut it into strips to create a lattice top or cover the pie with a full crust, making slits for steam to escape.
Trim and crimp the edges of the crust to seal in all the delicious filling, enhancing the pie’s presentation.
Place the pie on a baking sheet and bake for 15 minutes. Then, reduce the temperature to 350°F (175°C) and bake for an additional 30-35 minutes. This method helps in achieving a beautifully baked pie.
Remove from the oven and cool for at least an hour before slicing. This cooling time allows the filling to set, ensuring perfect slices.
Tips & Tricks
- Chef’s Secrets: Make sure to use fresh, ripe cherries for the best flavor. If you opt for frozen cherries, adjust the cooking time slightly to account for excess moisture.
- Optional Extras: Consider adding a pinch of almond extract to the filling for an extra layer of flavor.
- Cooking Hacks: If you want to save time, pre-made pie crusts are a great shortcut, while still allowing for a homemade filling.
Serving Suggestions & Pairings
This Perfect Homemade Cherry Pie is a delightful standalone dessert, but it shines even more when paired with a scoop of vanilla ice cream or a dollop of freshly whipped cream. For a twist, serve with a splash of warm custard or a sprinkle of powdered sugar for a touch of elegance.
Nutritional Information
While indulging in this pie, it’s essential to be aware of the nutritional profile. A typical slice of cherry pie contains approximately 300-400 calories, depending on the crust and sugar used. While some may view this as an indulgence, remember that it’s packed with the goodness of fruit, making it a treat worth savoring on special occasions.
Storing Tips & Variations for Perfect Homemade Cherry Pie
To store your pie, cover it loosely with plastic wrap or aluminum foil and keep it at room temperature for up to two days. For longer storage, you can refrigerate it for up to a week. If you have leftovers, consider freezing slices for a quick dessert later — simply thaw at room temperature before serving.
For healthier options, consider using whole wheat flour for the crust or replacing some of the sugar with honey or maple syrup. You could even experiment with other fruits like blueberries or raspberries to create a mixed berry pie that offers a new taste sensation.
Conclusion for Perfect Homemade Cherry Pie
The Perfect Homemade Cherry Pie is a dessert that invites you to slow down and savor each bite. Its simplicity and rich flavor make it a recipe worthy of your kitchen. So why not roll up your sleeves and get started today? Your taste buds will thank you!
FAQs
1. What type of cherries should I use for this pie?
You can use fresh sweet cherries, sour cherries, or even frozen cherries. Each offers a different flavor profile, allowing you to tailor the pie to your preference.
2. Can I make this pie ahead of time?
Absolutely! You can prepare the filling a day in advance and store it in the refrigerator. Assemble the pie and bake on the day you plan to serve it for the best results.
3. How can I tell if my pie is done baking?
The pie is done when the crust is golden brown, and you can see bubbling juices from the filling through the slits in the top crust.
4. Can I use a gluten-free crust?
Yes! Gluten-free pie crusts are widely available and can be used as a substitute for traditional pie crusts without compromising flavor.
5. What should I do with leftover pie?
Store leftover pie in the fridge for up to a week or freeze it for future enjoyment. Just make sure to cover it properly to avoid freezer burn.

Homemade Cherry Pie
Ingredients
Method
- Preheat your oven to 425°F (220°C).
- In a large mixing bowl, combine pitted cherries, sugar, flour, and lemon juice. Toss gently and let sit for 10-15 minutes.
- Roll out one half of your pie crust and transfer it to a pie dish. Trim any excess crust.
- Pour the cherry filling into the prepared crust, distributing it evenly. Dot with small pieces of butter.
- Roll out the second half of the pie crust and create a lattice top or cover with a full crust, cutting slits for steam.
- Trim and crimp the edges to seal the filling in.
- Place the pie on a baking sheet and bake for 15 minutes.
- Reduce the temperature to 350°F (175°C) and bake for an additional 30-35 minutes.
- Remove from the oven and cool for at least an hour before slicing.