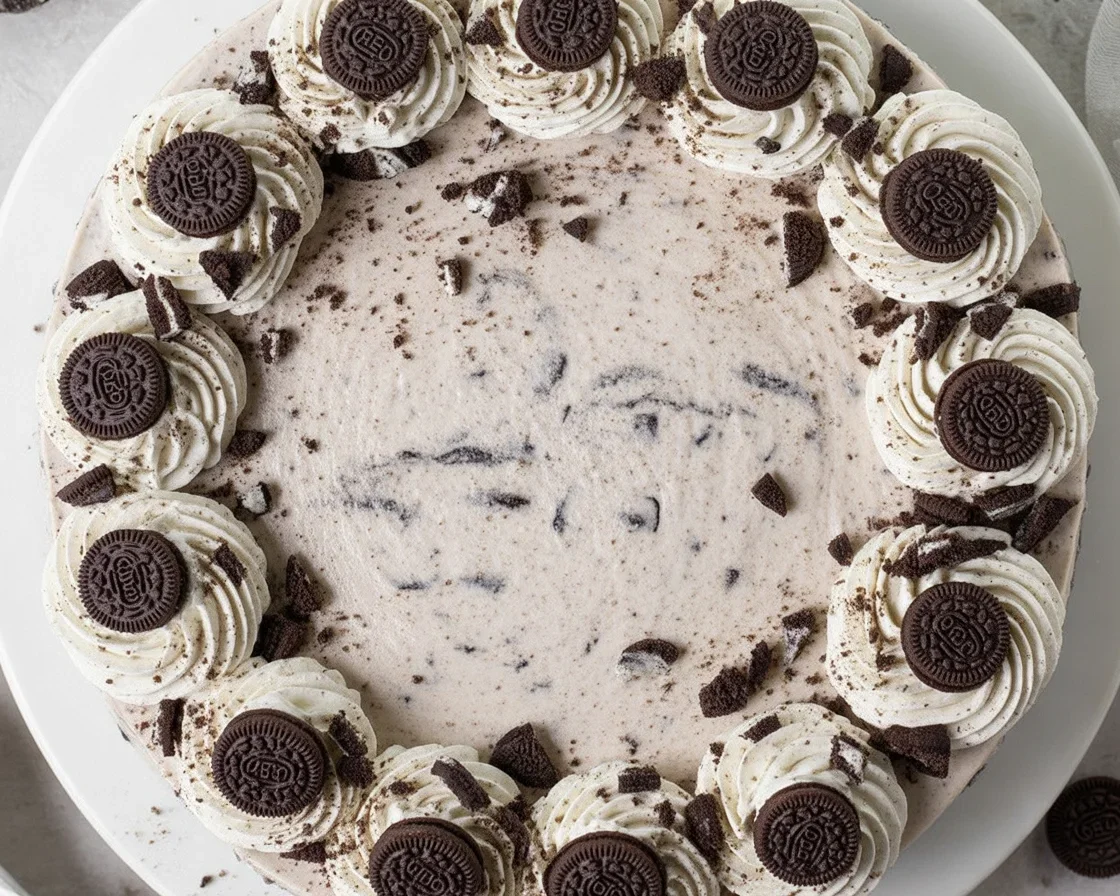
No-Bake Oreo Cheesecake is my secret weapon when late-night dessert cravings hit and I’m not in the mood for a hot oven.
Maybe it’s just me, but some days… the idea of a fancy, complicated dessert totally wears me out.
You want something sweet.
You want something cool.
You want something that actually tastes like you made an effort—without the actual effort.
Check out how this recipe stacks up next to these Oreo Cheesecake Bars if you’re needing more Oreo magic in your life.

Ever Think About Eating Cheesecake with Your Hands?
Okay, pause for one second.
Tell me—have you ever nearly eaten the filling out of an Oreo with a spoon because you just wanted that creamy goodness and couldn’t wait?
Or maybe you’ve walked by a bakery window and thought,
“Could I really make that giant swaggy-looking Oreo cheesecake there, or is it just professional wizardry?”
Here’s the kicker. No-Bake Oreo Cheesecake is something you can absolutely pull off in your own kitchen.
With no drama.
Seriously, you won’t believe how silly-easy it is.

Why You’ll Love This Recipe
Here’s the deal—life’s too short to fuss over complicated desserts.
You’ll get big, bold Oreo flavor, and it’s fast. Like, whip-it-together-during-dinner kind of fast.
No-bake means no stress about overbaking or cracked tops (whew, right?).
It works anytime: family get-togethers, binge-watching alone, midnight birthday “cake” for one.
Trust me, you’ll want to brag about this cheesecake all week.
Ingredients
Nothing fancy, promise.
You need about a pack of Oreos (standard size, not those weird double flavors),
some cream cheese (use the bricks, not the whipped stuff),
sugar, a bit of vanilla, and heavy whipping cream.
That’s pretty much the gist.
Oh—one pro tip—use butter to smush those Oreos for the crust.
If you want to get wild, toss some in the filling too.
The more Oreos, the merrier, right?

Timing
You’ll crank this out in about fifteen minutes if you’re quick. But—and this is the only hard part—chill time. Give your cheesecake at least 4 hours in the fridge (overnight if you can resist). That’s when the magic sets and you get that dreamy, sliceable texture. You can also pretend it’s “for the kids” if you need to sneak a piece early.
Step-by-Step
First, think: messy hands are part of the charm. Crush up those Oreos and add melted butter. Pat that glorious mixture into a pan. Next, blend up your cream cheese, sugar, vanilla, and a quick whip of heavy cream until it’s fluffy. Stir in more Oreo chunks. Plop it right on top of your crust. Smooth it out (lumpy bits are perfectly fine). Then, straight to the fridge. That’s it. Told you, ridiculously easy.
Nutritional Information
Listen, I’m not gonna sugarcoat it (actually, I am… literally). This is dessert. It’s got sugar, cream, and cookies, so it’s not what you’d call “light,” but hey, treat yourself every once in a while. Honestly, if you want numbers, a slice lands somewhere in the ballpark of 300-400 calories. Not for daily breakfast… unless you’ve had a really rough week.
Healthier Alternatives
If you’re feeling virtuous, you’ve got options. Swap out regular cream cheese for low-fat or Greek yogurt cream cheese. Try a lighter whipped topping for some of the cream. Sneak in sugar substitutes if that’s your jam. Gluten-free Oreos? Totally works. Does it still taste amazing? Yes—like, “second slice please” amazing.
Serving Suggestions
- Dollop some extra whipped cream on top if you’re going for five-star restaurant vibes.
- Sprinkle more crushed Oreos right before serving, because you can never have too many.
- Add a drizzle of chocolate syrup (or caramel, if you’re feeling wild).
- Serve extra cold for maximum creaminess.
Common Mistakes
Biggest goof? Not chilling long enough. You gotta be patient. Also, use blocks of cream cheese—spreadable stuff gets runny and sad. Don’t over-mix or you’ll get weird lumps that even extra Oreos can’t fix. Oh, and don’t skimp on the chilling. Did I say that already? Well, it’s worth repeating.
Storing Tips
Leftovers? (If you somehow have them.) Pop that cheesecake in an airtight container and chill it for up to four days. Heads up: If you’re in a crazy humid place, the crust might get a smidge soft after day three. A quick sit in the freezer for fifteen minutes before serving perks it right up.
Got Questions? Your FAQ Lifeline
Q: Can I freeze this cheesecake?
A: Yes! Wrap it up tight and freeze for up to a month. Let it thaw in the fridge before serving.
Q: Do I need a special pan?
A: Doesn’t matter. I use a basic cake pan, but a pie dish or any deep-dish round will do fine.
Q: Can I use different cookies?
A: Oh yes—Golden Oreos, peanut butter cookies, whatever. Maybe don’t go too wild on flavors unless you’re feeling adventurous.
Q: Is this easy enough for kids to help with?
A: Absolutely! Crushing cookies is a guaranteed crowd-pleaser for kids. Maybe just keep an eye on sneaky fingers swiping too many samples.
Time to Dig In: One Slice at a Time
So here’s the bottom line. This recipe is proof you don’t need fancy skills or kitchen gadgets to enjoy a next-level No-Bake Oreo Cheesecake that’ll impress your whole crew.
If you loved this, take a peek at more ideas like Oreo Cheesecake Bars and for a whole new spin check out the classic No-Bake Oreo Cheesecake for more dessert inspiration. Go on, try it—maybe this’ll be your new not-so-secret dessert hack.

No-Bake Oreo Cheesecake
Ingredients
Method
- Crush the Oreos and mix them with melted butter. Press the mixture into the bottom of a pan to form the crust.
- In a mixing bowl, blend cream cheese, sugar, vanilla, and heavy whipping cream until fluffy.
- Gently stir in the chopped Oreos.
- Pour the filling onto the crust and smooth it out.
- Refrigerate for at least 4 hours, or overnight for best results.