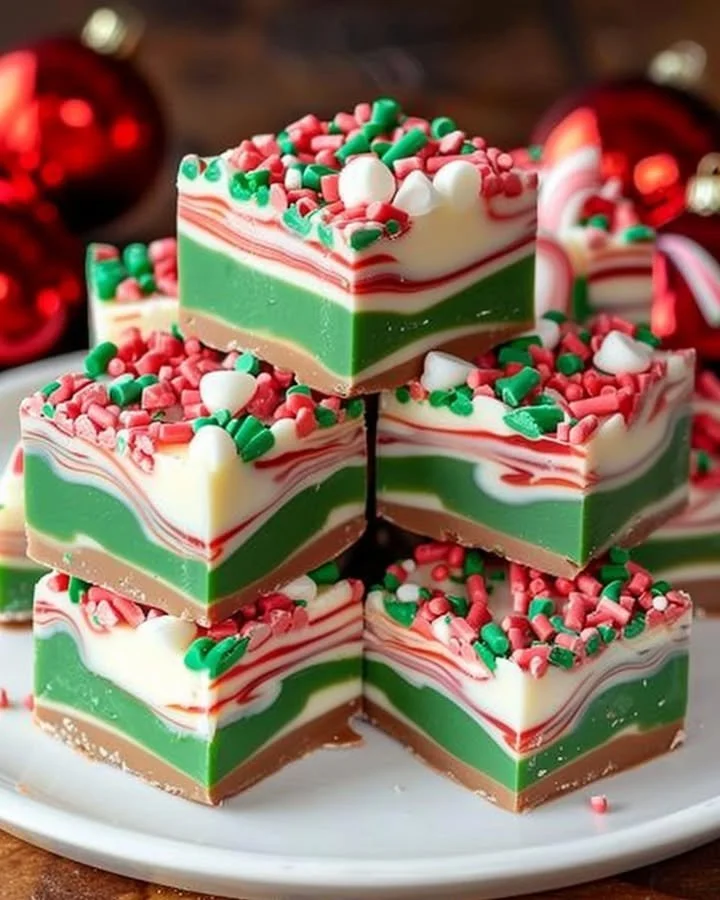
Christmas Fudge
Christmas Fudge is a delightful treat that encapsulates the warmth and joy of the holiday season. With its creamy texture, vibrant colors, and sweet aroma, this fudge is sure to become a festive favorite in your household. Imagine biting into a piece of this velvety fudge – it melts effortlessly in your mouth, bursting with the delightful flavors of vanilla and sweetened condensed milk. The vibrant red and green swirls not only make this fudge visually stunning but also create a nostalgic feeling that transports you back to childhood Christmases spent with family and friends. This recipe is truly worth making as it brings joy to both the maker and the lucky recipients. Plus, it’s quick and easy to prepare, allowing you to spend more time enjoying the holiday season.
Why You’ll Love This Recipe
One of the best parts about Christmas Fudge is its simplicity. With just minimal ingredients—three cups of white chocolate chips and a can of sweetened condensed milk—you can whip up a festive treat that looks as good as it tastes. This recipe is family-friendly, making it a fun activity for kids and adults alike. The step-by-step instructions make it simple to follow, ensuring you achieve perfect results every time. Plus, the vibrant colors and holiday sprinkles are sure to impress your guests and make any gathering feel even more special!
Ingredients for Christmas Fudge
To make the best Christmas Fudge, gather the following ingredients:
- 3 cups white chocolate chips: These chips are creamy, smooth, and will provide the perfect sweetness for your fudge. Their delicate flavor serves as a wonderful canvas for the festive colors.
- 1 (14-ounce) can sweetened condensed milk: This ingredient delivers the fudge’s rich, creamy texture while enhancing its sweet flavor.
- 1/2 teaspoon vanilla extract: A splash of vanilla adds depth and warmth to the fudge, making it irresistible.
- Red and green food coloring: The star of this recipe! These vibrant colors will create a festive look that’s perfect for the holiday season.
- 1/4 cup holiday sprinkles (optional, for decoration): Elevate your fudge presentation with a sprinkle of joy, adding a touch of whimsy and fun.
Step-by-Step Directions
Prepare the pan: Grab your 8×8-inch baking dish and line it with parchment paper or aluminum foil for easy removal later. This step is crucial for ensuring your fudge maintains its beautiful shape.
Melt the fudge mixture: In a medium saucepan, combine your white chocolate chips and sweetened condensed milk. Heat it over low to medium, stirring frequently until everything is beautifully melted and smooth. You’ll be amazed at how quickly it transforms!
Add vanilla extract: Once melted, stir in the vanilla extract until it’s all perfectly blended. The aroma will fill your kitchen, inviting everyone to gather around!
Color the fudge: Divide the fudge mixture into two bowls. Add red food coloring to one bowl and green to the other. Stir until the colors pop! This is where the magic happens, turning the fudge into a festive treat.
Layer the fudge: Spoon alternating layers of the red and green fudge into your prepared baking dish, and swirl gently for a fun marbled effect. Let your creativity shine in this step!
Chill and set: Pop the dish into the refrigerator for about 2-3 hours, or until your fudge is beautifully firm. This is the hardest part—waiting for the fudge to set!
Decorate (optional): If you’re feeling festive, sprinkle the top with holiday sprinkles for that extra touch of joy. This step adds a fun crunch and enhances the visual appeal.
Cut into squares: Once set, lift the fudge out of the pan and cut it into delightful squares or rectangles. Serve and enjoy the sweet holiday spirit!
Tips & Tricks
For a truly exceptional fudge experience, consider these chef’s secrets:
- Use quality chocolate chips: Opt for high-quality white chocolate chips for the best flavor and texture.
- Don’t rush the melting process: Keep the heat low and be patient, stirring frequently to prevent burning.
- Add nuts or dried fruit: For an extra texture, consider folding in chopped walnuts or cranberries before chilling.
- Experiment with flavors: You can substitute the vanilla extract with peppermint or almond extract for a unique twist!
Serving Suggestions & Pairings
Christmas Fudge is perfect for sharing, so consider presenting it on a festive platter adorned with seasonal decorations. Pair it with a glass of warm cocoa or spiced apple cider to enhance the holiday vibe. For holiday gatherings, cut the fudge into smaller bite-sized pieces and arrange them in small paper cups for easy serving. This treat is also great as a homemade gift when packaged in colorful boxes tied with ribbon—a charming gesture for neighbors, friends, or anyone you want to spread holiday cheer to!
Nutritional Information
Enjoying Christmas Fudge is a wonderful indulgence during the holiday season. Each piece provides a sweet treat that can easily brighten anyone’s day. While it’s important to enjoy it in moderation, here’s a rough breakdown of its nutritional values:
- Calories: Approximately 90 calories per square
- Fat: 4 grams (depends on the chocolate used)
- Carbohydrates: 14 grams
- Sugar: 12 grams
- Protein: 1 gram
Keep in mind that this fudge is a sweet, delightful treat meant for celebrating the season!
Storing Tips & Variations for Christmas Fudge
To store your Christmas Fudge, keep it in an airtight container at room temperature for up to a week. For longer preservation, you can refrigerate it for up to two weeks. If you want to keep leftovers even longer, consider freezing them. Just make sure to wrap them tightly in plastic wrap and then place them in a freezer-safe container. When you’re ready to enjoy again, let the fudge thaw in the fridge overnight.
For variations, try incorporating things like orange zest for a citrus twist or using dark chocolate chips for a richer flavor profile. You can also experiment with different food coloring to suit any occasion!
Conclusion for Christmas Fudge
Christmas Fudge is a must-try this holiday season, with its festive colors and creamy texture sure to elevate any gathering. It’s easy to make, fun to share, and truly captures the essence of holiday cheer. Don’t wait—grab your ingredients and start creating this delightful treat today!
FAQs
Can I use chocolate instead of white chocolate?
Yes! You can easily substitute white chocolate chips with semi-sweet or dark chocolate chips for a richer flavor profile.How long does it take for the fudge to set?
The fudge typically takes about 2-3 hours in the refrigerator to set properly.Can I use non-dairy alternatives?
Absolutely! You can use dairy-free white chocolate and coconut milk for a delicious vegan alternative.What should I do if my fudge doesn’t set?
If your fudge doesn’t set, it may be due to insufficient refrigeration time. Simply return it to the fridge for additional time or remelt and add a bit more chocolate to thicken it up.How do I cut the fudge neatly?
To achieve clean cuts, use a sharp knife and wipe it between cuts to ensure a clean and smooth surface.
This comprehensive guide is designed to make your Christmas Fudge journey both enjoyable and rewarding. Happy cooking!

Christmas Fudge
Ingredients
Method
- Prepare the pan by lining an 8x8-inch baking dish with parchment paper or aluminum foil.
- In a medium saucepan, combine white chocolate chips and sweetened condensed milk. Heat over low to medium, stirring frequently until melted and smooth.
- Once melted, stir in vanilla extract until blended.
- Divide the fudge mixture into two bowls. Add red food coloring to one and green to the other, stirring until colors are vibrant.
- Spoon alternating layers of red and green fudge into the prepared baking dish and swirl gently.
- Chill in the refrigerator for 2-3 hours, or until firm.
- Optionally, sprinkle holiday sprinkles on top before serving.
- Lift the fudge out of the pan and cut into squares or rectangles.