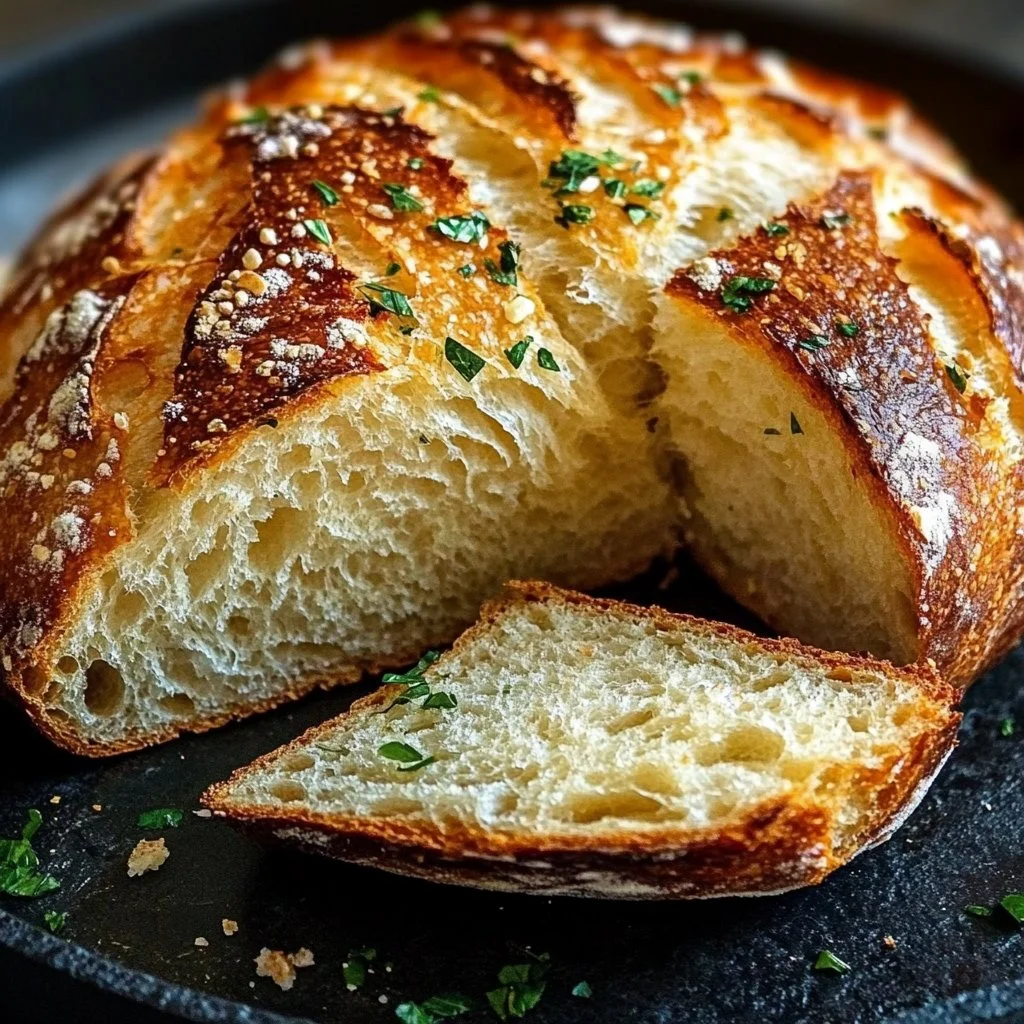
Garlic Herb Dutch Oven Bread
Garlic Herb Dutch Oven Bread is a culinary masterpiece that transcends ordinary homemade bread. Imagine pulling a warm, crusty loaf from the oven, its golden-brown exterior glistening under the kitchen light as the fragrant aroma of garlic and fresh herbs fills the room. This delightful recipe is not just about bread; it’s an experience to behold and savor, making every meal unforgettable. If you’ve been looking for a step-by-step guide that elevates your bread-baking game, this recipe is your ticket to success.
Homemade bread is not just a staple; it’s a labor of love. The simplicity of the ingredients combined with the elaborate flavors ensures that anyone, from novice cooks to seasoned bakers, can delight in the easy process and satisfying results. Not only is this bread delicious, but making it also allows you to bond with your family and friends, creating memories that are just as warming as the bread itself.
Why You’ll Love This Recipe
This Garlic Herb Dutch Oven Bread is perfect for those who appreciate simplicity and flavor. With easy prep and straightforward steps, even busy home cooks will find joy in crafting this beautiful loaf. Whether you are hosting a dinner party or simply enjoying a cozy evening at home, this bread pairs wonderfully with a range of dishes. Moreover, the minimal ingredients highlight the flavors of garlic and herbs, ensuring each bite is a taste sensation.
In just a few hours, you can prepare a fresh loaf that’s perfect for dipping in soups, serving alongside salads, or simply slathering with butter. And since it requires no kneading, this recipe is extremely approachable for anyone looking to bake homemade bread without the fuss.
Ingredients for Garlic Herb Dutch Oven Bread
Gathering the right ingredients is the first step to crafting your Garlic Herb Dutch Oven Bread. Here’s what you’ll need to conjure this enchanting loaf:
- 3 cups all-purpose flour: The foundation for your bread, providing structure and texture.
- 1 1/4 teaspoons salt: Essential for enhancing flavor and controlling fermentation.
- 1/2 teaspoon instant yeast: This little ingredient will help your dough rise beautifully.
- 1 1/2 cups warm water (about 110°F): Activates the yeast, creating a lovely, airy texture.
- 3 tablespoons olive oil: Adds richness and enhances moisture.
- 4 cloves garlic, minced: Infuses the bread with a flavor that’s undeniably mouthwatering.
- 1 tablespoon fresh rosemary, chopped: A fragrant herb that elevates the flavor profile.
- 1 tablespoon fresh thyme, chopped: Adds earthiness and depth to the loaf.
- 1 tablespoon fresh parsley, chopped: For a burst of freshness and color.
- Additional flour for dusting: Ensures the dough doesn’t stick to surfaces.
Step-by-Step Directions for Garlic Herb Dutch Oven Bread
Combine Dry Ingredients: In a large mixing bowl, place the all-purpose flour, salt, and instant yeast. Stir until well mixed, allowing the yeast to distribute evenly throughout the flour.
Mix Wet Ingredients: In a separate bowl, combine the warm water, minced garlic, olive oil, and chopped herbs (rosemary, thyme, and parsley). Mix until every ingredient is well blended.
Form the Dough: Pour the wet mixture into the bowl with the dry ingredients. Using a wooden spoon or your hands, stir until a shaggy dough forms. Don’t worry; the dough will be sticky and wet!
Let It Rest: Cover the bowl with plastic wrap or a clean kitchen towel. Allow it to rest at room temperature for 12 to 18 hours, or until the surface is bubbly and the dough has doubled in size. Your patience will be rewarded!
Shape the Loaf: Once the dough has risen, sprinkle a work surface with flour. Carefully turn the sticky dough out onto the floured surface. With floured hands, shape the dough into a round loaf, taking care not to knead it too much to keep it airy.
Second Rise: Dust the top of the loaf with flour and cover it with a kitchen towel. Allow it to rest for another 1 to 2 hours, letting it puff up slightly.
Preheat the Oven: About 30 minutes before you intend to bake, place a Dutch oven (with the lid) into the oven and preheat it to 450°F (230°C).
Transfer to Dutch Oven: Once preheated, carefully remove the Dutch oven from the oven. Remove the lid and place the bread loaf inside, then cover it with the lid again.
Bake the Bread: Bake the bread for 30 minutes with the lid on. After that, carefully remove the lid and bake for an additional 15 to 20 minutes, or until the bread is golden brown and crusty outside.
Cool and Enjoy: Once baked, transfer the bread to a wire rack and let it cool before slicing. Enjoy your warm Garlic Herb Dutch Oven Bread fresh from the oven!
Tips & Tricks
To make the most out of your Garlic Herb Dutch Oven Bread, consider these chef secrets:
- Garnish for Extra Flavor: Add a sprinkle of seasalt on the top of the loaf before baking for extra texture and flavor.
- Herb Variations: Feel free to experiment with different herbs or even add a hint of cheese.
- Use Fresh Ingredients: Fresh garlic and herbs will deliver the best flavor. Dried herbs can work in a pinch but won’t provide the same vibrant taste.
- Extra Crispy Crust: For an even crisper crust, place a small pan with water in the oven while baking to create steam.
Serving Suggestions & Pairings
This Garlic Herb Dutch Oven Bread is incredibly versatile. Serve it warm as a side to soup or salad, or use it to accompany your favorite dips. Pair it with garlic butter for a simple spread, or slice it for sandwiches that will impress at any lunch. You can even toast slices with a bit of cheese on top for a quick yet delicious snack.
Nutritional Information
While the exact caloric content will vary based on the specific ingredients used, one slice of Garlic Herb Dutch Oven Bread typically contains around 120-150 calories. It’s a delightful indulgence but can be easily part of a balanced diet when enjoyed in moderation.
Storing Tips & Variations for Garlic Herb Dutch Oven Bread
To keep your Garlic Herb Dutch Oven Bread at its best:
Storing: Keep the bread in a paper bag or wrapped in a kitchen towel at room temperature for up to three days. For longer storage, place it in an airtight container or plastic bag and freeze it.
Reheating: To revive the crustiness, pop frozen slices in a toaster or warm them in the oven just before serving.
Healthier Swaps: Substitute half of the all-purpose flour with whole wheat flour for a more nutritious loaf.
Creative Variations: Add in chopped olives, sun-dried tomatoes, or cheese to the dough for exciting flavors.
Conclusion for Garlic Herb Dutch Oven Bread
Now that you’ve learned to make this amazing Garlic Herb Dutch Oven Bread, it’s time to unleash your inner baker! The delightful aroma and flavor of this easy-to-make bread can transform any meal into an occasion. Don’t wait; gather your ingredients and try it today for an experience that will leave you coming back for more.
FAQs
1. Can I use bread flour instead of all-purpose flour?
Yes! Bread flour will give your Garlic Herb Dutch Oven Bread a chewier texture, while all-purpose flour will yield a lighter loaf.
2. How long does the dough need to rise?
For the best results, allow the dough to rise for 12 to 18 hours at room temperature.
3. Can I use dried herbs instead of fresh ones?
You can, but the flavor will be less vibrant. Use about 1 teaspoon of dried herbs to replace each tablespoon of fresh herbs.
4. What if I don’t have a Dutch oven?
While a Dutch oven produces the best crust, you can use any oven-safe pot with a lid. Alternatively, bake the bread on a baking sheet, but you may need to adjust the baking time.
5. Can I freeze Garlic Herb Dutch Oven Bread?
Absolutely! Wrap it tightly in plastic wrap and aluminum foil before freezing. It will keep well for up to three months. Enjoy!
Garlic Herb Dutch Oven Bread
Ingredients
Method
- In a large mixing bowl, place the all-purpose flour, salt, and instant yeast. Stir until well mixed.
- In a separate bowl, combine the warm water, minced garlic, olive oil, and chopped herbs. Mix until well blended.
- Pour the wet mixture into the bowl with the dry ingredients. Stir until a shaggy dough forms.
- Cover the bowl with plastic wrap or a clean kitchen towel. Allow it to rest at room temperature for 12 to 18 hours, or until the surface is bubbly and the dough has doubled in size.
- Sprinkle a work surface with flour and turn the sticky dough out onto it. Shape the dough into a round loaf.
- Dust the top of the loaf with flour and cover it with a kitchen towel. Let it rest for another 1 to 2 hours.
- About 30 minutes before baking, preheat the oven to 450°F (230°C) with a Dutch oven inside.
- Carefully remove the Dutch oven from the oven, place the bread loaf inside, and cover it with the lid.
- Bake the bread for 30 minutes with the lid on. Then, remove the lid and bake for an additional 15 to 20 minutes, or until golden brown.
- Transfer the bread to a wire rack and let it cool before slicing.