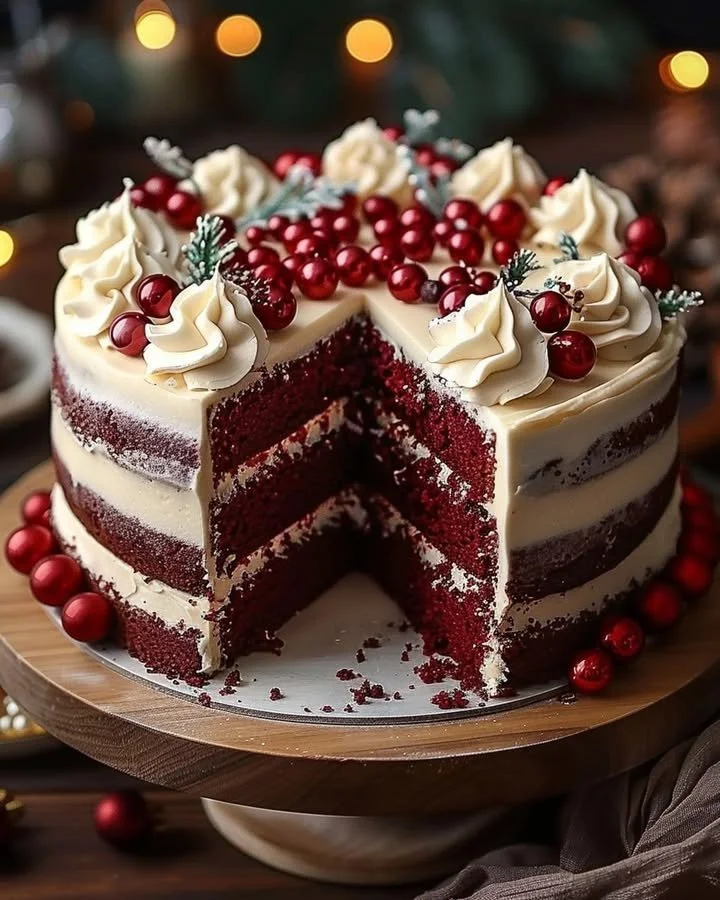
Red Velvet Cake
Red Velvet Cake is a stunning dessert that captures the hearts and palates of many. This recipe combines the rich flavors of cocoa and vanilla, delivering a soft, moist cake with a vibrant, eye-catching red hue. The striking contrast between the crimson cake and the creamy white frosting creates a feast for the senses that’s perfect for celebrations, special occasions, or simply satisfying a sweet craving. Making Red Velvet Cake is not just about enjoying a delicious treat; it’s about embracing the joy of baking and sharing.
Creating this delightful dessert is more than just a recipe; it’s a step-by-step journey that incorporates the art of baking with the joy of connecting with friends and family. If you haven’t made a Red Velvet Cake yet, you’re in for a real treat!
Why You’ll Love This Recipe
This Red Velvet Cake recipe is fantastic because of its simple yet tantalizing approach to baking. With easily accessible ingredients and straightforward instructions, even beginners can achieve wonderful results in no time. The batter combines to create a delectably moist cake, while the cream cheese frosting adds a creamy richness that perfectly compliments its soft texture.
Families will cherish this cake during birthdays, anniversaries, or even casual gatherings, sparking joy with every slice. Plus, it’s a classic treat that’s always a hit at potlucks and celebrations. If you’re looking to indulge in a delicious yet simple dessert, let this cake be your go-to recipe!
Ingredients for Red Velvet Cake
- 2 1⁄2 cups all-purpose flour: The foundation of your cake; creates that airy structure.
- 2 cups granulated sugar: Sweetens the cake to perfection.
- 1 teaspoon baking powder: Helps the cake rise beautifully.
- 1 teaspoon baking soda: Works alongside the baking powder for extra fluffiness.
- 1 teaspoon salt: Balances out the sweetness and enhances flavor.
- 2 tablespoons unsweetened cocoa powder: Adds a subtle chocolate flavor for depth.
- 1 1⁄2 cups buttermilk: Ensures moisture, tenderness, and a slight tang.
- 1 cup vegetable oil: Keeps the cake silky smooth and rich.
- 2 large eggs: Binding agents that provide structure.
- 2 teaspoons vanilla extract: Adds warmth and flavor.
- 1 tablespoon red food coloring: The star ingredient that gives the cake its iconic hue.
- 1 teaspoon white vinegar: Reacts with baking soda, contributing to lightness.
- 16 oz cream cheese, softened: The key for a creamy, smooth frosting.
- 1 cup unsalted butter, softened: Adds richness to the frosting.
- 4 cups powdered sugar: Sweetens and thickens your frosting perfectly.
- 2 teaspoons vanilla extract: An extra touch to elevate the frosting flavor.
Step-by-Step Directions
Preheat your oven to 350°F (175°C) and grease the bottoms of two 9-inch round cake pans with flour to keep the cakes from sticking.
In a large mixing bowl, whisk together your flour, sugar, baking powder, baking soda, salt, and cocoa powder until well combined.
In a separate bowl, mix together the buttermilk, vegetable oil, eggs, vanilla extract, red food coloring, and white vinegar until smooth and bubbly.
Gradually pour the wet mixture into the dry ingredients, mixing until you have a luscious, smooth batter.
Evenly divide the cake batter between the prepared pans and smooth the tops.
Pop them into the preheated oven and bake for 25-30 minutes, or until a toothpick comes out clean when inserted into the center.
Once baked, let the cakes cool in the pans for about 10 minutes, then gently transfer them to a wire rack to cool completely.
While the cakes cool, whip up the frosting by beating the cream cheese and softened butter together until creamy. Gradually add in the powdered sugar, mixing well after each addition, and finish with a splash of vanilla extract.
When your cakes are completely cool, place one layer on a serving plate and generously spread frosting over the top. Add the second layer and frost the entire cake to perfection.
For a festive touch, feel free to sprinkle some colorful decorations or sprinkles on top! Enjoy your masterpiece!
Tips & Tricks
To elevate your baking experience, consider these chef’s secrets and optional extras. For a more intense flavor, add a teaspoon of almond extract to your batter. If you want a deeper red hue, feel free to adjust the amount of food coloring to your preference. Always remember to use room-temperature ingredients for a smoother batter.
You can also swap out the buttermilk for yogurt if you need a healthier option, and for a fun twist, be bold and add chocolate chips to the batter! They will melt and create little pockets of gooey goodness.
Serving Suggestions & Pairings
When it comes to serving Red Velvet Cake, presentation is key. Dust the top with cocoa powder or shaved chocolate for an elegant finish. Pair each slice with a dollop of whipped cream or fresh berries for added freshness and contrast.
This cake pairs beautifully with a cup of coffee or tea, making for a delightful afternoon treat. If you’re hosting a gathering, consider serving it alongside a variety of desserts, such as cupcakes or cookies, for a dessert table that everyone will love.
Nutritional Information
A slice of Red Velvet Cake can be a delightful indulgence. Standard serving sizes maintain a balance of sweetness and flavors. Depending on the specific recipe and portion size, each slice can contain approximately 350-450 calories, but it’s important to enjoy it in moderation as an occasional treat.
Remember that indulging in a delicious dessert can be part of a balanced diet if eaten mindfully!
Storing Tips & Variations for Red Velvet Cake
To store your Red Velvet Cake, wrap it tightly in plastic wrap or place it in an airtight container. It can last for up to 3 days at room temperature or up to a week in the refrigerator. For longer shelf life, consider freezing the cake layers without frosting. Simply wrap them in plastic and aluminum foil, and they can last up to 3 months in the freezer.
For variations, you can try using different frostings, such as a whipped cream topping or a chocolate ganache. Reinvent your cake by adding nuts, fruit preserves between layers, or even using a gluten-free flour blend for dietary needs.
Conclusion for Red Velvet Cake
There’s something undeniably special about making a Red Velvet Cake. The vibrant colors, rich flavors, and creamy frosting come together beautifully to create an unforgettable dessert. We encourage you to try this recipe right away. It’s not just a cake; it’s a celebration in every bite!
FAQs
1. Can I use a different type of food coloring?
Yes, you can experiment with natural food coloring or even beet juice for a healthier alternative, though it may slightly alter the taste.
2. Is there a way to make this cake healthier?
Absolutely! You can substitute sugar with a natural sweetener, use whole wheat flour instead of all-purpose, or use Greek yogurt instead of buttermilk for added protein.
3. Can I bake this cake in a different pan size?
Yes, just adjust the baking time accordingly. Cupcakes or a larger 9×13 inch pan will require different baking times, usually fewer for cupcakes and longer for larger pans.
4. How do I know when my cake is fully baked?
Insert a toothpick in the center of the cake; if it comes out clean or with a few moist crumbs attached, your cake is done.
5. What should I do if my cake layers dome?
To combat dome-shaped cakes, ensure even leveling of the batter in your pans and try to rotate your cakes halfway through baking to promote even heat distribution.
Enjoy embarking on your baking adventure with this Red Velvet Cake recipe, bringing joy and sweetness to every celebration!
Red Velvet Cake
Ingredients
Method
- Preheat your oven to 350°F (175°C) and grease the bottoms of two 9-inch round cake pans with flour to keep the cakes from sticking.
- In a large mixing bowl, whisk together your flour, sugar, baking powder, baking soda, salt, and cocoa powder until well combined.
- In a separate bowl, mix together the buttermilk, vegetable oil, eggs, vanilla extract, red food coloring, and white vinegar until smooth and bubbly.
- Gradually pour the wet mixture into the dry ingredients, mixing until you have a luscious, smooth batter.
- Evenly divide the cake batter between the prepared pans and smooth the tops.
- Pop them into the preheated oven and bake for 25-30 minutes, or until a toothpick comes out clean when inserted into the center.
- Once baked, let the cakes cool in the pans for about 10 minutes, then gently transfer them to a wire rack to cool completely.
- While the cakes cool, whip up the frosting by beating the cream cheese and softened butter together until creamy.
- Gradually add in the powdered sugar, mixing well after each addition, and finish with a splash of vanilla extract.
- When your cakes are completely cool, place one layer on a serving plate and generously spread frosting over the top.
- Add the second layer and frost the entire cake to perfection.
- For a festive touch, feel free to sprinkle some colorful decorations or sprinkles on top! Enjoy your masterpiece!