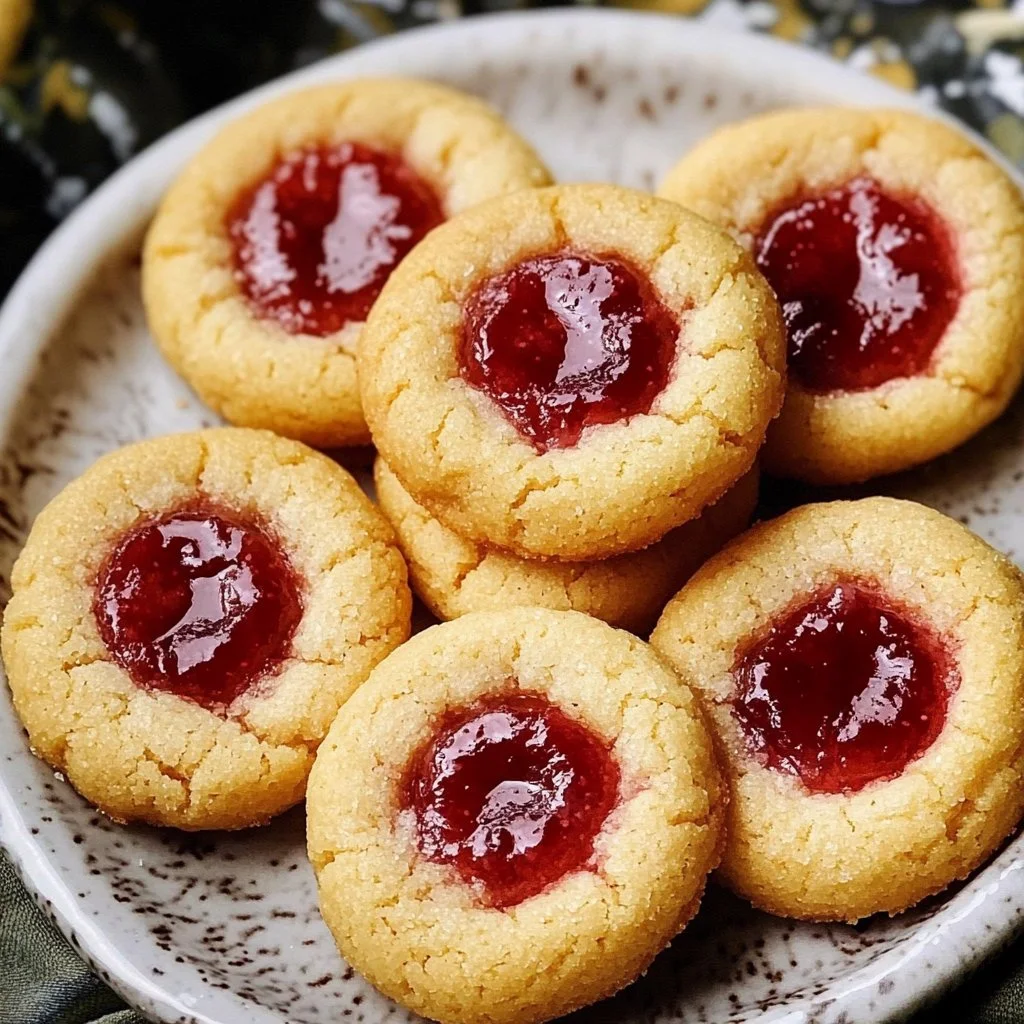
Jam Drops Cookies: The Ultimate Guide to Baking Perfection
There’s something magical about the first bite of a freshly baked Jam Drops cookie—soft, buttery, and oozing delicious fruit jam. These nostalgic little treats are a perfect blend of sweetness and warmth, making your heart swoon with every crumb. Whether you’re looking for a quick dessert to whip up for your kid’s school event or trying to recreate cherished memories of baking with loved ones, Jam Drops cookies are an absolute delight. With minimal ingredients and simple steps, this recipe promises to deliver cookies that can brighten any day, old or new.
So why not indulge in the comfort of these adorable cookies?
What’s your ultimate comfort cookie moment?
Do you remember the last time you took a bite of a soft, gooey cookie filled with sweetness? Perhaps it was the aroma wafting through the kitchen during a family gathering or the joy on your kid’s face when they took their first bite. Imagine those moments enriched by the delectable, fruity flavor of Jam Drops cookies.
Whether it’s a rainy afternoon or a sunny picnic day, these cookies can evoke a sense of nostalgia that wraps you in warmth and love. What could be sweeter than curling up with a warm cookie in hand and a cup of tea?
Why You’ll Love This Recipe
Let’s dive into what makes these Jam Drops cookies a must-bake:
Easy Prep: With quick preparation time, you can whip these cookies together while multitasking.
Kid-Friendly: Kids will love shaping the cookies and, of course, eating them!
Minimal Ingredients: You likely already have most of the ingredients in your pantry.
Crowd-Pleaser: Irrespective of age, these cookies are sure to be a hit at gatherings.
Nostalgic: They transport you back to simpler times, evoking heartwarming memories.
Ingredients
Before we get to the baking, let’s gather your ingredients to ensure you’re ready to create cookie magic:
225g (1 cup) unsalted butter, softened: The foundation of buttery goodness.
150g (¾ cup) granulated sugar: Adds sweetness and a delightfully crisp texture.
1 large egg: Eggs bind ingredients, ensuring your cookies are soft.
1 teaspoon vanilla extract: The aroma of vanilla wafting through your kitchen is irresistible.
300g (2 ½ cups) all-purpose flour: Creates the perfect structure for your cookies.
¼ teaspoon salt: A pinch to balance flavors and enhance sweetness.
Your favorite jam (strawberry, raspberry, apricot, or mixed berry work well): The star of the show, offering a gooey, fruity surprise.
Optional: A dusting of powdered sugar to top them off, adding a touch of elegance.
Timing
When it comes to Jam Drops cookies, the beauty is in their perfect baking balance—fast yet indulgent!
Fast and Indulgent: With only about 30 minutes of prep time and 10 minutes in the oven, your cravings will soon be satisfied!
Slow and Luxurious: Embrace the joy of chilling the dough and letting the flavors meld for the best outcome.
Step-by-Step
Ready to embark on your sweet adventure? Follow these simple steps to bake Jam Drops cookies to perfection:
Cream the Butter and Sugar
In a large bowl (or the bowl of your stand mixer), cream together the softened butter and granulated sugar until light and fluffy—about 3-5 minutes. Let the silky-smooth texture of the butter and sugar dance together. Scrape down the sides of the bowl to incorporate every last bit.
Add the Egg and Vanilla
Beat in the egg and vanilla extract until they meld beautifully with the mixture. The aromatic blend will waft through your kitchen, beckoning taste buds. Don’t forget to scrape the bowl to ensure everything is well combined!
Combine Dry Ingredients
In a separate medium bowl, whisk together the all-purpose flour and salt. The flour gives structure, and the salt enhances the cookie’s sweet profile.
Gradually Add Dry Ingredients to Wet Ingredients
Now is the time to blend! Gradually add the dry ingredients to your wet mixture, mixing on low speed until just combined. Be mindful not to overmix; you want the dough tender and ready, not tough.
Form the Dough into a Disc
Turn the dough out onto a lightly floured surface. Gently knead it a few times to bring it together into a smooth disc, signaling the arrival of deliciousness! Wrap the disc tightly in plastic wrap, ensuring it’s well covered for chilling.
Chill the Dough
Refrigerate the dough for at least 30 minutes (or up to 2 hours) to let those flavors develop. While you wait, you could mentally prepare for the blissful flavors awaiting you.
Preheat the Oven
Preheat your oven to 175°C (350°F). Line baking sheets with parchment paper or silicone baking mats to ensure they bake evenly.
Roll Out the Dough
On a lightly floured surface, roll out the chilled dough to about 1/4 inch thickness. The cold dough will roll out perfectly, creating an ideal canvas for your cookie shapes.
Cut Out the Cookies
Grab your favorite cookie cutter and start to cut out shapes from the dough. Make sure to have an even number of cookies to maximize your jammy goodness.
Cut Out Centers of Half the Cookies
Using a smaller cookie cutter (or even a sharp knife), cut out the centers of half of the cookies. These holes will create the perfect window to showcase your gooey jam.
Place Cookies on Baking Sheets
Carefully transfer the cookies to the prepared baking sheets, leaving about 1 inch of space between each cookie. The anticipation builds as they get ready for the oven.
Bake the Cookies
Bake for 8-10 minutes, or until the edges are lightly golden brown. The aroma will flood your kitchen, making it almost impossible to resist.
Cool the Cookies
Let them cool on the baking sheets for a few minutes before transferring them to a wire rack to cool completely. Patience is key, but the wait is worth it!
Prepare the Jam
If your jam is particularly thick, warm it slightly in the microwave or on the stovetop. This step ensures a smooth, luscious filling.
Spread Jam on Bottom Cookies
Take the flat side of each cookie with no center cutout, and spread a small amount of jam (about a teaspoon) across it. The anticipation heightens as the cookies get that irresistible jam infusion.
Top with Cut-Out Cookies
Carefully stack the cookies with cut-out centers on top of the jam-covered cookies, gently pressing them together. It creates that iconic Jam Drops sandwich!
Dust with Powdered Sugar (Optional)
For a fairy-tale touch, dust the finished cookies with powdered sugar. This final flourish elevates your delicious creations.
Nutritional Information
Although indulging in Jam Drops cookies is pure bliss, it’s beneficial to know their nutritional content. Each cookie contains around 150 calories, depending on the size—perfect for a sweet treat that truly satisfies. Remember, a cookie here and there can be part of a balanced diet, adding warmth and joy to your day!
Healthier Alternatives
While the classic Jam Drops cookies are divine, consider these healthier alternatives if you’re looking to lighten things up:
Low-Sugar Options: Replace granulated sugar with a low-calorie sugar substitute to reduce overall sugar content.
Dairy-Free Swaps: Swap unsalted butter with coconut oil or a dairy-free margarine for a vegan-friendly cookie.
Serving Suggestions
Each bite of your Jam Drops cookies can be elevated further with delightful pairings—think of serving them warm with a scoop of vanilla ice cream for a craving-worthy dessert.
They are also excellent for festive gatherings, holiday parties, or a sweet treat for children during birthdays! They transform any occasion into a memorable moment filled with sweetness and joy.
Common Mistakes
Baking is an art, and even seasoned bakers can falter. Look out for these common mistakes:
Overbaking: Keep an eye on your cookies in the oven; they should be golden around the edges but still soft in the center.
Texture Issues: Overmixing the dough can lead to tough cookies. Mix only until just combined.
Messes: Preparing your baking area and using parchment paper can help minimize tearing your dough and keep cleanup easy.
Storing Tips
Want to enjoy your Jam Drops cookies later? Store them properly to maintain that delightful flavor.
Freezing Portions: If you want to bake in batches, shape the dough into discs, wrap in plastic, and freeze for up to three months.
Reheating Instructions: When ready to enjoy again, pop them in the oven at a low temperature for a few minutes to get that fresh-baked taste back!
Don’t wait—bake these cookies ASAP!
With their warm, buttery goodness and a dollop of jam, these Jam Drops cookies are calling your name. Perfect for any occasion, they will delight family and friends alike. So preheat your oven, gather your ingredients, and transform your kitchen into a haven of sweetness and joy. You won’t regret it—especially when that first aromatic bite delivers a comforting wave of nostalgia.
Let’s bake some Jam Drops cookies today and create delicious memories!
FAQs
Can I use store-bought jam?
Yes! Any type of store-bought jam works perfectly in this recipe.How long do these cookies last?
Stored in an airtight container, they will last for about a week—but they usually get eaten much sooner!Can I leave out the jam?
While the jam is a key component, you can make plain cookies or fill them with chocolate ganache instead!What other flavors can I use?
Feel free to experiment with different flavored jams like blackberry, cherry, or even citrus marmalade!Can I make these cookies gluten-free?
Yes! Substitute all-purpose flour with a gluten-free flour blend, and you’ll still have delicious cookies!
Baking Jam Drops cookies will surely bring sweetness to your day—what are you waiting for?
Jam Drops Cookies
Ingredients
Method
- Cream together the softened butter and granulated sugar until light and fluffy—about 3-5 minutes.
- Beat in the egg and vanilla extract until well combined.
- In a medium bowl, whisk together the all-purpose flour and salt.
- Gradually add the dry ingredients to the wet mixture, mixing on low speed until just combined.
- Turn the dough out onto a lightly floured surface and gently knead it into a smooth disc.
- Wrap the disc tightly in plastic wrap and refrigerate for at least 30 minutes.
- Preheat your oven to 175°C (350°F) and line baking sheets with parchment paper.
- Roll out the chilled dough to about 1/4 inch thickness.
- Cut out cookie shapes from the dough, ensuring you have an even number.
- Using a smaller cutter, cut out the centers of half the cookies.
- Transfer cookies to the baking sheets, leaving space between them.
- Bake for 8-10 minutes, or until edges are lightly golden brown.
- Let the cookies cool on the sheets for a few minutes before transferring them to a wire rack.
- If necessary, warm your jam slightly for easy spreading.
- Spread a small amount of jam on the flat side of each cookie without a center cutout.
- Top with cut-out cookies and gently press together.
- Dust with powdered sugar if desired.