Homemade Milky Ways
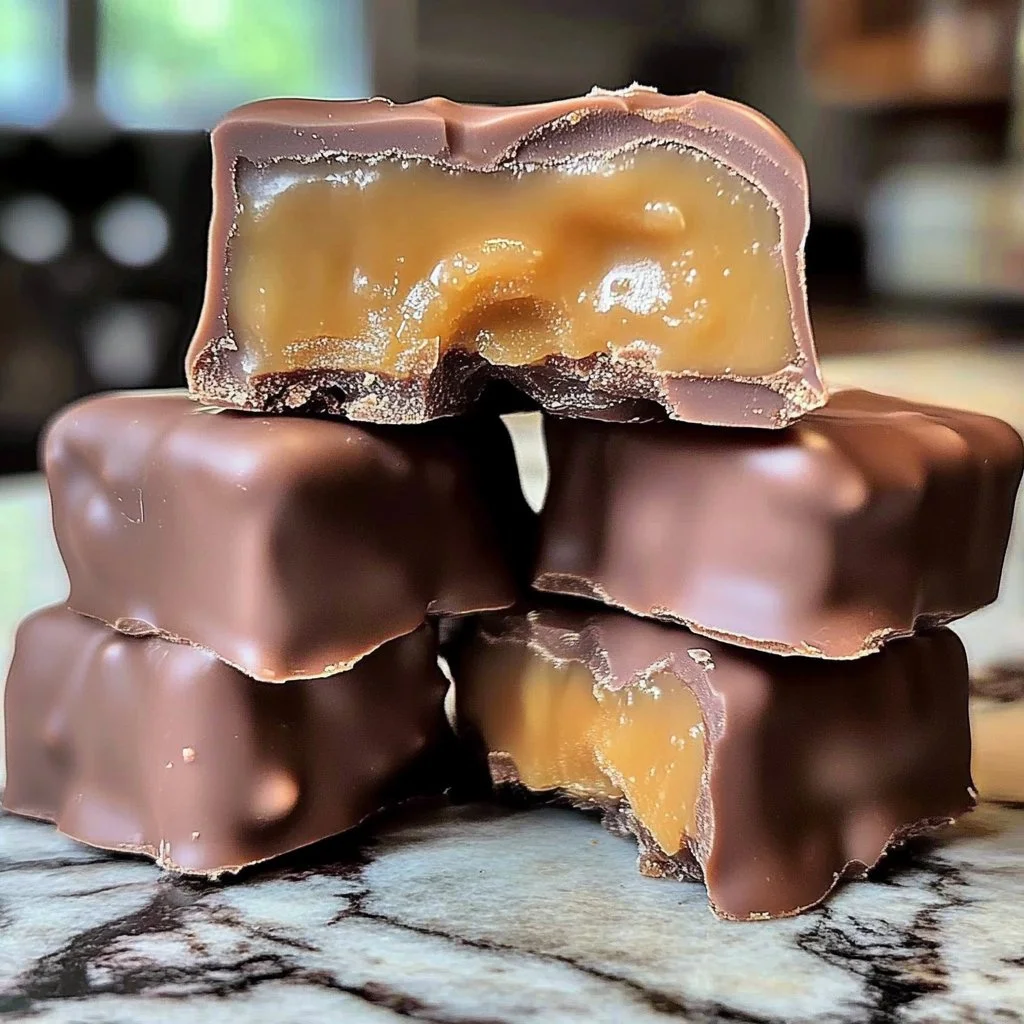
When it comes to indulgent treats that appeal to both the young and the young-at-heart, Homemade Milky Ways shine like the stars in a dessert lover’s sky. Imagine biting into a creamy, chewy nougat blanketed in velvety, rich chocolate, all while experiencing a rush of nostalgia—those sweet days of youth where candy bars reigned supreme! This recipe is not only easy to put together, but it’s also a delightful adventure to undertake—perfect for sharing with kids or creating a sweet memory with friends.
The best part? You get these crave-worthy candies right in your kitchen with minimal fuss, and their delightful flavors will have everyone asking for more.
What’s Your Favorite Sweet Memory?
Do you remember the joy of unwrapping a candy bar after a long day, letting the delicious aroma waft up and entice your senses? What about those school lunches where a homemade treat was a treasure stashed away for a midday pick-me-up? With Homemade Milky Ways, you have the chance to recreate those blissful moments and make new memories. Think about indulging in these wonderfully gooey bars while sharing laughter at family gatherings or cozy nights in. Are you ready to bring back those sweet traditions?
Why You’ll Love This Recipe
There are countless reasons why this Homemade Milky Ways recipe deserves a permanent spot in your kitchen:
Easy Preparation: With just a few simple steps, you can whip up these decadent morsels in no time!
Minimal Ingredients: This recipe uses pantry staples, making it easy on the wallet and ensuring you can satisfy those sweet cravings anytime.
Nostalgic Treat: Perfectly reminiscent of the classic candy bar, these homemade bars will ignite warm memories and create new traditions.
Crowd-Pleaser: Whether it’s a birthday party, holiday gathering, or just a cozy night in, everyone will cherish these delightful treats.
Ingredients
- 1 cup granulated sugar
- 1/2 cup light corn syrup
- 1/4 cup unsalted butter
- 1/2 cup evaporated milk
- 1 tsp vanilla extract
- 1 cup mini marshmallows
- 1/2 cup milk chocolate chips
- 1 cup caramels, unwrapped
- 2 tbsp milk
- 2 cups milk chocolate chips
- 2 tbsp vegetable oil (optional)
Gather these ingredients, and get ready to embark on a sweet journey of flavor. Picture the softness of mini marshmallows and the glossy sheen of melted chocolate as you prepare to create something truly special!
Timing
Creating Homemade Milky Ways is a delightful balance between fast indulgence and luxurious treats.
In under an hour, you can have your candy bars chilling away in the refrigerator before they transform into heavenly bites. Although the overall time includes chilling periods, you’ll find that the active preparation doesn’t take long at all. It’s the kind of sweet endeavor that leaves you with a warm sense of accomplishment and the divine smell of melted chocolate wafting through your home! Perfect for those moments when you want a quick yet unforgettable dessert!
Step-by-Step
In a saucepan, combine the granulated sugar, corn syrup, butter, and evaporated milk over medium heat.
Stir constantly until the mixture bubbles with excitement, then continue to cook for about 5 minutes until it thickens slightly—a deliciously gooey transformation.
Remove from the heat and add the warm vanilla extract, mini marshmallows, and milk chocolate chips. Stir until everything melds together seamlessly into a smooth, dreamy nougat.
Pour the nougat mixture into a greased 8×8 inch pan, spreading it evenly. Chill in the refrigerator until it firms up—about 30 minutes of sweet anticipation!
While the nougat is setting, craft the luscious caramel layer—combine the unwrapped caramels and milk in another small saucepan. Heat over low, stirring until melted and smooth, creating that perfectly sticky goodness.
Once the nougat has set, pour the warm caramel over the nougat layer, spreading it to create an even, rich layer. Chill again until everything is set for another 30 minutes.
After chilling, cut the layered mixture into bars about 1 inch wide and 3 inches long, and arrange them on a parchment-lined tray, creating a visual feast!
For the heavenly chocolate coating, melt the remaining chocolate chips in a microwave-safe bowl in 30-second intervals, stirring in between until smooth. For an extra luxurious texture, mix in vegetable oil until smooth.
Dip each bar into the luscious melted chocolate, ensuring they’re entirely enveloped in that silky goodness. Return them to the parchment-lined tray, and let the excess chocolate drip off.
Finally, allow the coated bars to set at room temperature, or refrigerate until the chocolate solidifies completely—this will take some patience but is well worth the wait!
Nutritional Information
Indulging in Homemade Milky Ways is undoubtedly a treat, so let’s take a look at the nutritional details:
- Calories: Approximately 150 per bar (You’ll want to savor every bite!)
While these bars are occasionally indulgent, they undoubtedly deserve a home in your treat rotation! Savoring one or two satisfies your sweet tooth without compromise.
Healthier Alternatives
Nice to enjoy treats, right? If you’re seeking a lighter option, consider trying some of these healthier alternatives for your Homemade Milky Ways!
Low-Sugar: Substitute granulated sugar with a low-calorie sweetener like monk fruit or erythritol for a guilt-free experience.
Dairy-Free: Use coconut milk in place of evaporated milk and opt for dairy-free chocolate chips for a wonderful, creamy result tailored to your dietary preferences.
Nut-Based Variations: Incorporate almond butter or cashew butter into the nougat for added flavor and nutrition without compromising the creamy texture.
Serving Suggestions
Imagine how delightful these Homemade Milky Ways would be served with a scoop of your favorite vanilla ice cream for an ultimate treat!
Consider placing them on a festive platter during holidays or family gatherings, stunning guests with your homemade delights. Cut them into assorted sizes for a party snack, or store them in a beautiful jar as gifts for neighbors and friends! The loyalty and love you embed in your baking will surely shine through!
Common Mistakes
As with any recipe, a few learning curves may arise when preparing Homemade Milky Ways. Here are some common pitfalls to avoid:
Overbaking: Although there’s no explicit baking involved, extending the simmering time can lead to a tough nougat. Stick to the recommended times for that perfect pliability.
Texture Issues: Stirring continuously is critical for promoting consistent heat distribution, which ensures smooth textures.
Messes: Working with sticky ingredients can create chaos. Keep a damp cloth handy to manage spills promptly!
Storing Tips
Have leftovers? Storing Homemade Milky Ways can be simple and effective!
Freezing Portions: Wrap each bar individually in plastic wrap and store them in an airtight container in the freezer. They can last for up to 3 months, making them a delightful, quick treat whenever your sweet tooth strikes!
Reheating Instructions: Simply let the bars sit at room temperature for about 10 minutes before enjoying, or if you’re feeling adventurous, warm them slightly in the microwave for 10-15 seconds for that ooey-gooey experience!
Tempted to Make Them ASAP?
Creating Homemade Milky Ways is more than just preparing a delectable dessert; it invokes feelings of nostalgia and a shared love for sweet indulgences. Whether you’re making them for a special occasion or simply to satisfy that sweet tooth, I can’t encourage you enough to dive into this recipe today! Unlock the magic behind these mouthwatering bars, and make memories as you share them with loved ones!
FAQs
Can I use a different type of chocolate for the coating?
Absolutely! Feel free to experiment with dark chocolate, white chocolate, or even flavored chocolate for a fun twist.How long do Homemade Milky Ways last?
When stored properly in an airtight container, they can last about two weeks in the pantry or up to three months in the freezer.What can I substitute without affecting the taste?
You can try using coconut oil instead of vegetable oil for a different flavor profile, or even honey in place of corn syrup for a unique taste twist.Can children help with this recipe?
Definitely! This is a fun, kid-friendly project with adult supervision—just be cautious with the hot ingredients.How do I ensure my caramel layer doesn’t harden?
To maintain a gooey caramel texture, limit cooking time once melted, and refrigerate only until set, as too much time could lead to a more rigid layer.
Dive in, and make this indulgent treat part of your dessert repertoire!