Homemade Christmas Candies
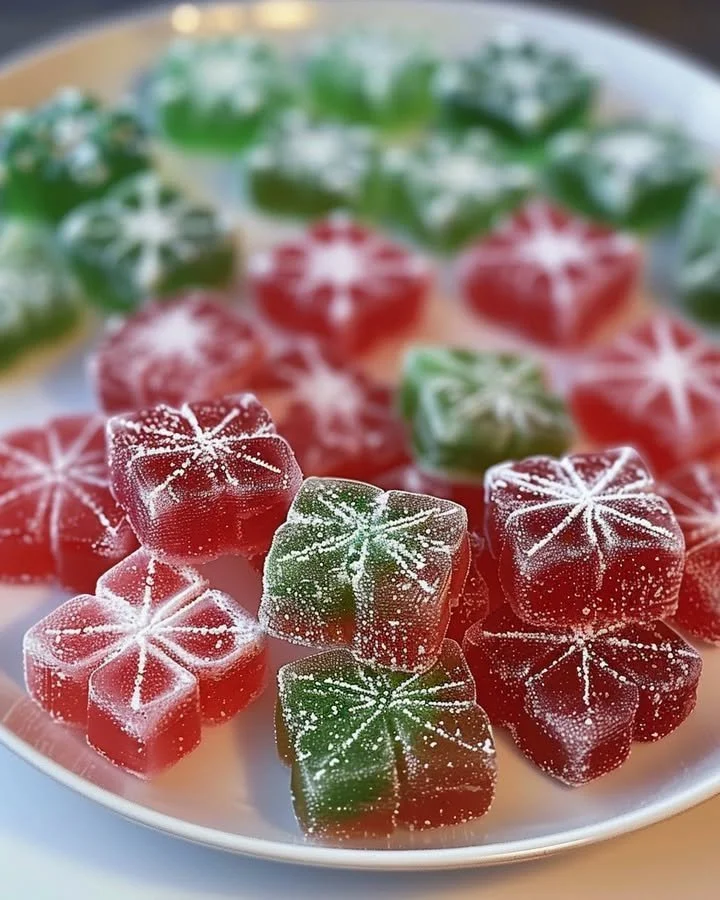
Homemade Christmas Candies are a delightful treat that can fill your holiday season with sweetness and joy. Creating these candies at home is not only easy but also allows you to experiment with flavors and colors that evoke the festive spirit. The chewy, fruity goodness of these candies makes them perfect for sharing with loved ones or adding to your holiday dessert table. With this Step-by-Step recipe, you’ll find that making Christmas candies is not just a culinary project; it’s a fun and rewarding holiday activity that creates lasting memories.
Why You’ll Love This Recipe
This Homemade Christmas Candies recipe offers numerous benefits that make it a must-try this holiday season. Firstly, the preparation is remarkably simple, perfect for busy families looking to whip up something festive without fuss. It serves well as a kid-friendly project, where little hands can help pour, mix, and mold the candy shapes. The ingredients are minimal, encouraging creativity in flavor profiles while ensuring you know exactly what’s going into your treats. The quick process allows you to enjoy homemade candy in just a few hours, making it a traditional delight that feels timely and modern.
Ingredients for Homemade Christmas Candies
- 1 cup fruit juice: Choose a vibrant juice like cranberry or pomegranate for a rich flavor and beautiful color.
- 1/4 cup water: This helps to dissolve the gelatin evenly for a smooth texture.
- 3 tbsp unflavored gelatin: Essential for giving your candies that perfect chewy consistency.
- 1/4 cup honey or maple syrup: Adds natural sweetness; choose based on your preferred taste.
- 1/2 tsp lemon juice (optional): A dash of lemon can brighten the flavor profile.
- Red and green food coloring (optional): These festive colors are perfect for Christmas!
- Powdered sugar (for dusting): A light coating to prevent sticky fingers and enhance the sweet experience.
Step-by-Step Directions
Prepare the Gelatin Mixture: In a small saucepan, combine the fruit juice and water. Sprinkle the gelatin over this mixture and let it sit for about 5 minutes. This step allows the gelatin to bloom, ensuring that your candies have the perfect consistency once set.
Heat the Mixture: Place the saucepan over medium heat. Stir gently until the gelatin completely dissolves, resulting in a smooth mixture—about 5 minutes. Once melted and velvety, add in the honey or maple syrup and lemon juice (if desired). Mix until well combined, bringing all flavors together.
Color the Candy (Optional): Separate the gelatin mixture into two bowls. Add red food coloring to one and green to the other, stirring until the colors are blended evenly.
Pour the Mixture into Molds: Carefully pour your gelatin mixture into silicone candy molds or a small baking dish lined with parchment paper. Place in the fridge for 2-3 hours until completely firm and set.
Unmold and Coat with Powdered Sugar: Gently remove the candies from the molds. To finish them off and reduce stickiness, lightly dust the candies with powdered sugar, adding a sweet touch to your festive delight!
Tips & Tricks
Use Fresh Juice: For enhanced flavor, opt for fresh fruit juice instead of store-bought varieties. It makes a noticeable difference!
Experiment with Flavors: Try using a combination of different juices for unique flavor profiles.
Mold Shapes: Use cookie cutters in festive shapes for a creative twist. Christmas trees and stars are always a hit!
Storage: If you have leftovers, store the candies in an airtight container at room temperature to maintain their chewiness.
Gift Idea: These homemade candies make wonderful holiday gifts. Package them beautifully in cellophane bags, and they’re perfect for friends and family!
Serving Suggestions & Pairings
Present your Homemade Christmas Candies on a decorative holiday platter accompanied by other seasonal treats, like cookies and nuts, to create a delightful dessert spread. For an extra festive touch, consider pairing these candies with hot cocoa or spiced apple cider. They could even be used as fun toppings for ice cream or yogurt, transforming a simple dish into a holiday treat.
Nutritional Information
While fun and festive, it’s good to be aware of the nutritional content. Each piece of candy contains natural sugars from the juice and honey or maple syrup, which keeps them somewhat healthy compared to traditional candies loaded with artificial ingredients. Enjoy these treats mindfully as part of your holiday celebrations.
Storing Tips & Variations for Homemade Christmas Candies
These Homemade Christmas Candies can be stored in an airtight container at room temperature for about a week, ensuring you have festive treats on hand. For longer storage, consider freezing them. Simple allow the candies to thaw at room temperature before enjoying. If you’d like a healthier version, use agave nectar instead of honey or maple syrup, or experiment with sugar substitutes as desired. You can also introduce variations by adding chopped nuts or dried fruits to enhance flavor and texture!
Conclusion for Homemade Christmas Candies
Now that you have the perfect recipe for Homemade Christmas Candies, it’s time to get into the kitchen and whip up your batch! With their vibrant colors, delightful flavors, and simple preparation, these candies will undoubtedly become a treasured tradition in your holiday repertoire. So gather your ingredients, rally the family, and dive into the joy of making these delicious treats!
FAQs
1. Can I use different types of juice?
Absolutely! Feel free to get creative with your favorite juices; just be mindful of the flavors.
2. How long do these candies last?
They can stay fresh for up to a week at room temperature or longer if frozen.
3. Can I make these vegan?
Yes! Opt for agar-agar instead of gelatin for a plant-based alternative.
4. What molds work best?
Silicone candy molds are ideal, but you can use any shape you prefer, including parchment-lined trays.
5. Are there any allergy considerations?
Always be cautious of any allergies when gifting or serving these candies, and consider alternatives to honey for those with bee product allergies.
Homemade Christmas Candies
Ingredients
Method
- In a small saucepan, combine the fruit juice and water. Sprinkle the gelatin over this mixture and let it sit for about 5 minutes to allow the gelatin to bloom.
- Place the saucepan over medium heat. Stir gently until the gelatin completely dissolves, about 5 minutes. Add in the honey or maple syrup and lemon juice (if desired), mixing until well combined.
- Separate the gelatin mixture into two bowls. Add red food coloring to one and green to the other, stirring until the colors are blended evenly.
- Carefully pour your gelatin mixture into silicone candy molds or a small baking dish lined with parchment paper. Refrigerate for 2-3 hours until completely firm.
- Gently remove the candies from the molds. Lightly dust the candies with powdered sugar to reduce stickiness.