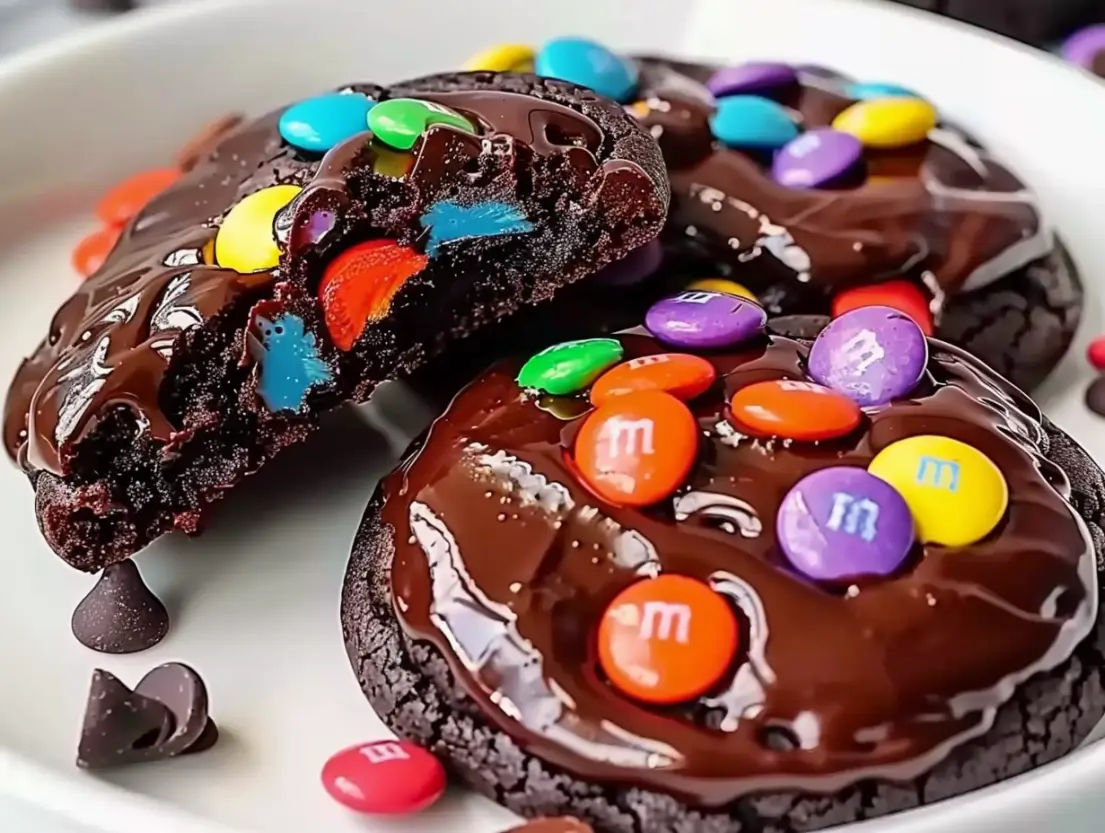
If you’re a fan of Cosmic Brownies, then these Cosmic Brownie Cookies are going to be your new favorite indulgence. Combining the rich, fudgy texture of brownies with the fun, cookie form, this treat is a nostalgic yet innovative twist on a classic snack. With a decadent chocolate base, colorful candy topping, and a soft, chewy center, these cookies are perfect for any occasion — from cozy family nights to birthday parties or bake sales. Whether you’re a beginner baker or a seasoned pro, this recipe will bring joy to your taste buds and make you the star of your next gathering.
In this post, we’ll walk through how to make Cosmic Brownie Cookies from start to finish, provide helpful tips and variations, and offer storage suggestions so you can enjoy these cookies for days. Ready to bake? Let’s dive in!
Why You’ll Love Cosmic Brownie Cookies
Cosmic Brownie Cookies are a playful twist on a beloved snack cake. These cookies combine everything we love about the classic Cosmic Brownies — the intense chocolate flavor, the chewy texture, and, of course, the signature rainbow candy coating. But unlike traditional brownies, these cookies come in a portable, perfectly sized portion that’s easy to share (or keep to yourself!). They are ideal for anyone who enjoys rich, chocolatey desserts and wants to try something new that’s still comforting and nostalgic.
If you’re a busy parent, these cookies are a fantastic treat to make with your kids, too. The easy preparation and colorful candy topping make them a fun baking project that kids will love to help with. Plus, they’ll love eating them afterward!
Ingredients for Cosmic Brownie Cookies
To get started, you’ll need a few simple ingredients. Most of these are staples that you probably already have in your kitchen. Here’s what you’ll need to make your Cosmic Brownie Cookies:
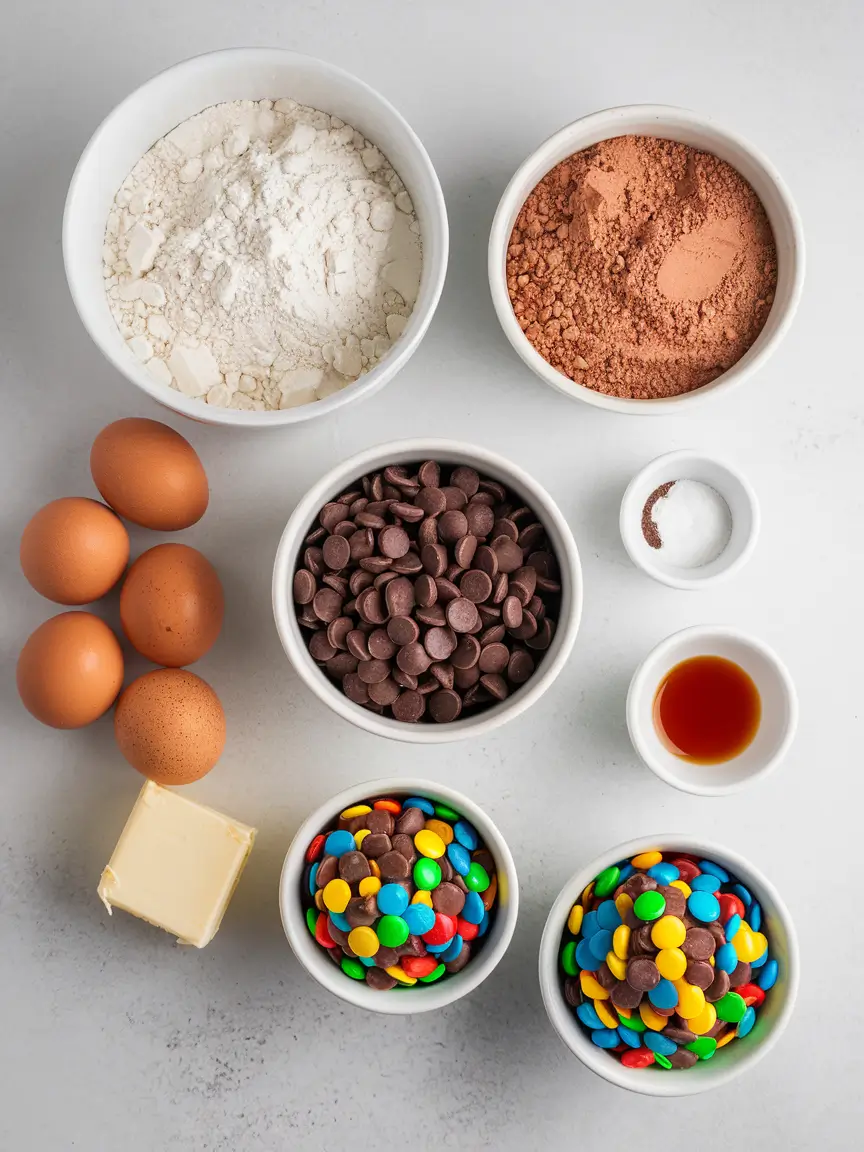
- 1 cup all-purpose flour
- 1/2 cup unsweetened cocoa powder
- 1/2 teaspoon baking soda
- 1/4 teaspoon salt
- 1/2 cup unsalted butter, softened
- 1 cup brown sugar, packed
- 2 large eggs
- 1 teaspoon vanilla extract
- 1 cup semi-sweet chocolate chips
- 1/4 cup rainbow candy-coated chocolate pieces (think M&M’s or similar)
Directions to Make Cosmic Brownie Cookies
Making these cookies is as easy as mixing together a few ingredients and popping them into the oven. Here’s a step-by-step guide to help you achieve the perfect batch of Cosmic Brownie Cookies:
Step 1: Preheat Your Oven
Start by preheating your oven to 350°F (175°C). Place parchment paper on a baking sheet to prevent the cookies from sticking and make cleanup easier.
Step 2: Mix Dry Ingredients
In a medium-sized bowl, whisk together the all-purpose flour, cocoa powder, baking soda, and salt. Put this bowl aside while you prepare the wet ingredients.
Step 3: Cream Butter and Sugar
In a large mixing bowl, use an electric mixer (or a stand mixer) to cream together the softened butter and brown sugar until the mixture is light and fluffy. This will take about 2-3 minutes. Make sure the butter is softened to room temperature for the best results — it ensures the ingredients blend smoothly.
Step 4: Add Eggs and Vanilla
Add the eggs one at a time, beating well after each addition. Mix in the vanilla extract to add an extra layer of flavor.
Step 5: Combine Wet and Dry Ingredients
Slowly incorporate the dry ingredients into the wet ingredients, stirring until just combined. Avoid overmixing the dough to keep the cookies soft and chewy.
Step 6: Fold in the Chocolate Chips
Once the dough is well combined, fold in the semi-sweet chocolate chips. This will give your cookies that gooey, chocolatey interior.
Step 7: Scoop and Shape
Using a cookie scoop or tablespoon, scoop rounded portions of dough onto your prepared baking sheet, spacing them about 2 inches apart. These cookies will spread slightly as they bake, so give them some room.
Step 8: Bake the Cookies
Place the baking sheet in the preheated oven and bake the cookies for 10-12 minutes, or until the edges are set and the centers are slightly soft. Remember that the cookies will continue to firm up as they cool, so don’t worry if they’re a little soft in the center.
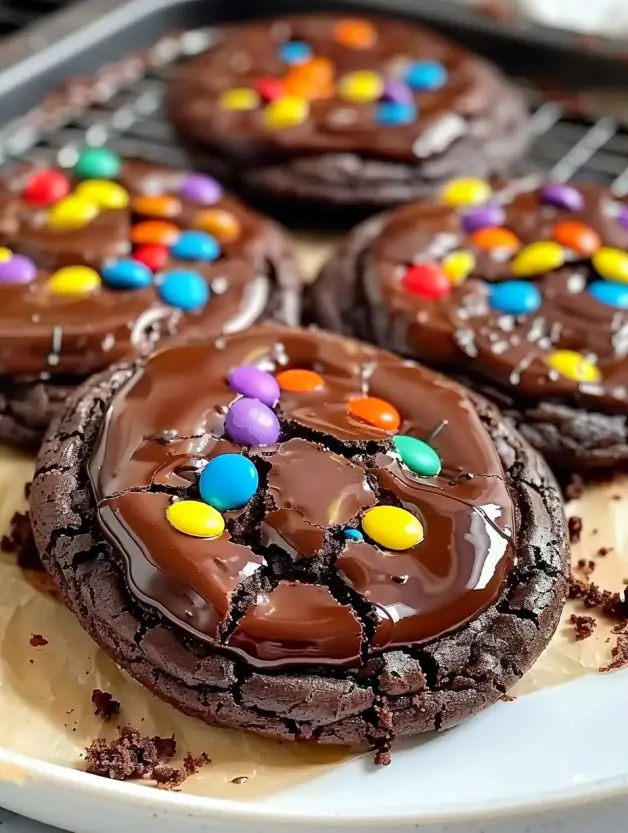
Step 9: Add Rainbow Candies
While the cookies are still warm, gently press a few rainbow candy-coated chocolate pieces onto the tops of the cookies. This is the signature touch that makes them look just like the Cosmic Brownies we all know and love.
Step 10: Cool and Enjoy
Allow the cookies to cool on the baking sheet for about 5 minutes, then move them to a wire rack to cool completely. The cookies will firm up as they cool, giving them the perfect chewy texture. Once cooled, enjoy the sweet chocolatey goodness!
Tips and Variations for Cosmic Brownie Cookies
-
Use High-Quality Cocoa Powder: For the best flavor, opt for a high-quality cocoa powder, such as Dutch-processed cocoa. It will make your cookies richer and more flavorful.
-
Add Nuts for Crunch: If you love the combination of chocolate and nuts, try adding chopped walnuts or pecans to the dough for an extra crunchy texture.
-
Customize the Toppings: While rainbow candy-coated chocolate pieces are the signature topping, feel free to get creative! Try using chopped up chocolate bars, sprinkles, or mini marshmallows.
-
Make Them Gluten-Free: If you need to make these cookies gluten-free, simply swap out the all-purpose flour for a gluten-free flour blend. Just make sure it contains xanthan gum to help provide structure.
-
Double the Batch: These cookies are so delicious that you’ll want to make a double batch. You can freeze any extra dough or baked cookies for later.
Storing Leftovers
If you happen to have any leftover Cosmic Brownie Cookies (which is rare, but it happens!), here’s how to store them:
- At Room Temperature: Store the cookies in an airtight container at room temperature for up to 4-5 days. Make sure to separate layers of cookies with parchment paper to prevent them from sticking together.
- In the Freezer: If you want to keep them longer, place the cookies in a freezer-safe container or a Ziploc bag and freeze for up to 3 months. When you’re ready to enjoy them again, let them thaw at room temperature or pop them in the microwave for a few seconds for a warm treat.
Food and Drink Pairings
These Cosmic Brownie Cookies are rich and indulgent, making them the perfect treat to pair with something light to balance out the sweetness. Here are a few suggestions:
- Milk: A classic pairing, the creamy taste of milk complements the intense chocolatey cookies.
- Coffee: The bitterness of coffee pairs wonderfully with the sweetness of these cookies. Try it with a dark roast or a latte for an extra boost.
- Ice Cream: Serve the cookies warm with a scoop of vanilla ice cream on top for an irresistible dessert sundae.
FAQs About Cosmic Brownie Cookies
1. Can I use a different type of chocolate for these cookies? Yes! You can use milk chocolate chips, white chocolate chips, or even dark chocolate chips, depending on your preference. The cookies will taste different, but still delicious!
2. Is it possible to make these cookies in advance? Absolutely! You can prepare the cookie dough ahead of time and store it in the refrigerator for up to 2-3 days before baking. Alternatively, you can freeze the dough for up to 3 months and bake the cookies when you’re ready.
3. Why did my cookies spread too much? If your cookies spread too much, it could be because the dough was too warm when placed on the baking sheet. Try chilling the dough for about 30 minutes before baking, which helps prevent excessive spreading.
4. Can I freeze the baked cookies? Yes! Cosmic Brownie Cookies freeze well. Just make sure to store them in an airtight container or freezer bag, and they’ll stay fresh for up to 3 months.
Final Thoughts
Cosmic Brownie Cookies are the perfect balance of chewy, fudgy, and sweet. Whether you’re looking for a fun treat to make with kids or need a delicious dessert to impress guests, this recipe is guaranteed to please. Don’t forget to get creative with toppings and variations to make it your own!
Now, it’s time to bake! Give this recipe a try and let us know how it goes! If you love these cookies, share the recipe with your friends and family, and don’t forget to subscribe to our blog for more delicious recipes. Happy baking!